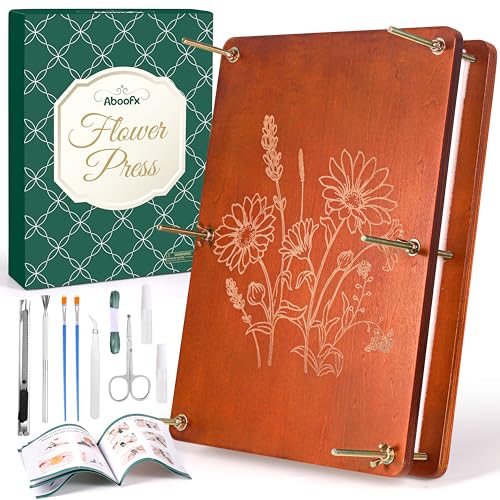
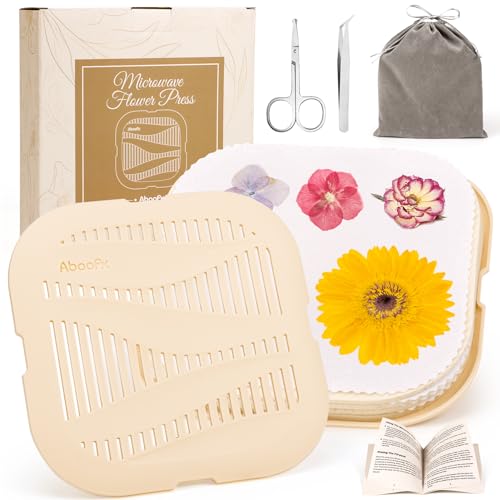
Pressing flowers is one of the best ways to remember an important event like a wedding or funeral. We've created a list of the best flower press kits to help you get started. These kits have good reviews and are high quality. We have reviewed these products and recommend all of them. Below we will explain how to press flowers on your own if you are trying to do that.
Aboofx Extra Large Flower Press Kit

Price: $37.99
Key Features:
- Extra large size of 10.8 x 10.8 inches
- Complete set for beginners
- Sturdy and high quality
- Portable press storage
- Perfect gift idea
We like this kit because it is super easy to use if you are a beginner. If you watch a youtube video on how to use a flower press kit, and then start using this you won't have an issue doing it by yourself.
wisedry Flower Press Kit

Price: $42.99
Key Features:
- Single rotary pressing rod for easy use
- Even pressure with centered pressing rod
- Press six layers of flowers at once
- Eco-friendly and beautifully packaged
This is super high quality and will last you a while if you are planning on pressing flowers more than once. I would definitely recommend this if that is the case.
Rhykoka Large Flower Press

Price: $26.79
Key Features:
- Extra large size of 11x11 inches
- 10 layers flowers press kit
- Thick sturdy wooden flower press
- Traditional flower press design
- Perfect gift for nature DIY lovers
Wakhow Flower Press Kit

Price: $25.99
Key Features:
- Large size of 11.02 x 11.02 inches
- Easy to use for adults and kids
- High-quality basswood construction
- Versatile and portable
- Make life more ritualistic with DIY crafts
Premium Extra Large Wooden Flower Press Kit

Price: $59.97
Key Features:
- Extra large size with 10 layers
- Better results with solid maple wood
- Includes package of dried flowers
- Complete craft kit with artisan quality
This is definitely on the more expensive side of things but it has 10 layers and is very high quality. If you are looking for the best outcome of all, you probably should go with this one. I really like this style of wood and know that it will give you the best outcome.
Aboofx Extra Large Flower Press Kit

Price: $59.99
Key Features:
- Large size and 6 layers for pressing various flowers
- Comprehensive pressing kit for beginners
- High quality wood construction
- Widely use for different crafts
- Perfect gift idea for nature lovers
Aboofx Large Professional Flower Press Kit

Price: $21.99
Key Features:
- Full flower press kit for professionals
- High-quality materials for durability
- Wide application for various crafts
- Perfect gift idea for craft lovers
Rhykoka Large Flower Press Kit

Price: $18.89
Key Features:
- Large flower press suitable for adults
- Sturdy and durable construction
- 10 layers competitive pressing kit
- Easy to use traditional design
- Great gift for DIY enthusiasts
Aboofx 4 Layers Microwave Flower Press Kit

Price: $31.99
Key Features:
- Large size with 4 layers for ample space
- Rapid drying for quick results
- Superior color retention
- Versatile use for various crafts
- Perfect gift idea for craft lovers
How to Press Flowers?
If you are looking to press flowers on your own, there are definitely ways to do it. You are going to need a very heavy book/ object to put
-
Select and Prepare Flowers:
- Choose flowers that are fresh and not too thick. Thin flowers like pansies, daisies, and violets work best.
- If the flowers are super thick, consider pressing just the petals or cutting them in half.
-
Pre-Press Preparation:
- Remove any unwanted leaves or parts of the stem.
- Make sure the flowers are dry. If they are damp, gently blot them with a paper towel.
-
Place the Flowers:
- Open your book to a middle page, or prepare your flower press.
- Place a piece of absorbent paper on the book page or in the flower press.
- Arrange the flowers on the paper, making sure they don’t overlap.
- Place another piece of absorbent paper on top of the flowers.
-
Press the Flowers:
- Close the book carefully or secure the flower press.
- If using a book, place additional heavy books on top to apply pressure.
- Leave the flowers undisturbed for about 2-4 weeks. The time can vary depending on the type of flower and humidity levels.
-
Check and Remove:
- After the pressing period, check the flowers to ensure they are completely dry and flat.
- If they are not fully pressed, leave them for another week.
- Once pressed, carefully remove the flowers using tweezers if needed to avoid damage.
-
Store or Use:
- Store the pressed flowers in a cool, dry place between sheets of paper to keep them flat.
- Use them in crafts, art projects, scrapbooks, or as decorations.
Tips:
- Use flowers that are in full bloom but not overripe.
- Experiment with different types of flowers and leaves to see which press best.
- Ensure good airflow around the pressing area to avoid mold growth.
Why Press Flowers?
- Preserves memories: Pressed flowers serve as tangible reminders of special moments.
- Eco-friendly decor: Create sustainable, natural art for your home.
- Therapeutic hobby: The process can be calming and meditative.
- Versatile craft material: Use pressed flowers in various DIY projects like cards, bookmarks, or framed art.
Creative Ideas for Using Pressed Flowers
- Framed botanical art
- Personalized stationery or cards
- Custom phone cases
- Resin jewelry or coasters
- Scrapbooking embellishments
These are good products to get you started out if you are looking to get into flower pressing. Obviously it is hard to be professionals with these kits but they are a cheaper option if you can't afford someone with lots of experience.


